
The Complete Guide to Projector Connections: How to Use and Choose HDMI, USB, and Wireless Inputs
えい ほうShare
📋 What you'll learn in this article
- Features and proper usage of HDMI, USB, and wireless connection methods
- Specific connection procedures for Fire TV Stick, PS5, PC, and iPhone
- Causes and solutions for common issues like no sound or no image
- Optimal connection methods for different uses (movies, gaming, presentations)
Introduction: Incorrect connection methods compromise image and sound quality
Many problems when buying a projector, such as "no sound," "no image," or "noticeable lag," are often caused by incorrect connection method selection.
This article will explain various connection methods for projectors with actual operating procedures, helping you choose the optimal connection method for your specific use case.
Chapter 1: Comparison of Connection Method Types and Features
1.1 List of Major Connection Methods
| Connection Method | Latency | Image Quality | Stability | Primary Use Cases |
|---|---|---|---|---|
| HDMI (Wired) | Minimal (1-5ms) | Highest | ◎ | Gaming, Movies, Presentations |
| USB (Direct Playback) | None | File dependent | ○ | Video files, Photos |
| Wireless Mirroring | Medium to High (50-200ms) | Compressed | △ | Smartphone screen sharing |
| Bluetooth | Audio only | — | ○ | External speaker connection |
| Built-in Apps (WiFi) | Low (Streaming) | Streaming quality dependent | ○ | Netflix, YouTube |
💡 Basic Principle: For gaming or low-latency applications, always choose a wired HDMI connection. Wireless should only be used when convenience is the priority.
Chapter 2: Practical HDMI Connection Procedures
2.1 Basic HDMI Connection
- Turn off both the projector and the device.
- Connect the HDMI cable to the projector's HDMI input port.
- Connect the other end to the device (PC, game console, Fire TV Stick, etc.).
- Turn on the projector and switch the input source to "HDMI".
- Turn on the device.
✅ Connection Check: If no image appears, press the "Input" button on the projector's remote control to select HDMI.
2.2 Device-Specific Connection Procedures
🎮 PS5 / Nintendo Switch
- Connect directly with an HDMI cable (HDMI 2.1 compatible cable recommended for PS5).
- Activate Game Mode on the projector to minimize latency.
- When using Switch, connect in dock mode (handheld mode is not supported).
💻 PC / Mac
- If an HDMI port is available: Connect directly with an HDMI cable.
- If only USB-C is available: Use a USB-C to HDMI adapter.
- Mac: System Settings → Displays → Select "Mirror" or "Extend".
- Windows: Press Win+P to select the display mode.
📺 Fire TV Stick / Chromecast
- Insert directly into the projector's HDMI port.
- Power is supplied via the USB port or the included adapter.
- If there is no sound: Fire TV Settings → Display & Audio → Audio → Change to "Stereo".
📱 iPhone / iPad
- Use a Lightning to HDMI adapter (Apple genuine recommended).
- USB-C equipped models (iPad Pro, etc.): Connect with a USB-C to HDMI adapter.
- For wireless connection: An AirPlay or mirroring compatible projector is required.
📱 Android Smartphones
- USB-C to HDMI adapter (only for devices supporting DisplayPort Alt Mode).
- For unsupported devices, use wireless mirroring (Miracast).
Chapter 3: Direct Playback via USB Connection
3.1 Supported Formats for USB Playback
| File Type | General Support Status | Notes |
|---|---|---|
| MP4 (H.264) | ◎ Supported by almost all models | Most stable |
| MKV | ○ Supported by many models | Depends on codec |
| AVI | △ Model dependent | Older format |
| MOV | △ Model dependent | Apple format |
| 4K HEVC (H.265) | ○ Increasing support | Requires processing power |
⚠️ If playback fails: Converting the file to MP4 (H.264) format usually resolves the issue. Free tools like HandBrake can be used for conversion.
3.2 USB Playback Procedure
- Save the video file to the root folder of the USB drive.
- Insert the USB drive into the projector's USB port.
- Switch the input source to "USB" or "Media".
- Select the desired file from the file browser for playback.
Chapter 4: Setting Up Wireless Connection
4.1 WiFi Mirroring (Screen Mirroring)
It is assumed that the projector and smartphone are connected to the same WiFi network.
Android (Miracast)
- On the projector, select "Wireless Mirroring" or "Miracast".
- Android Settings → Connected devices → Cast (or Screen cast).
- Select the projector's device name to connect.
iPhone (AirPlay)
- Only usable with AirPlay-compatible projectors.
- Open Control Center and tap "Screen Mirroring".
- Select the projector's device name.
💡 Tip to Reduce Lag: Using 5GHz band WiFi for wireless connections can improve lag by approximately 30-50%. The 2.4GHz band is prone to interference and tends to be unstable.
Chapter 5: Common Connection Troubles and Solutions
5.1 No Image Appears
- ✅ Check the input source selection (via the "Input" button on the remote).
- ✅ Re-plug the HDMI cable.
- ✅ Try a different HDMI port (if multiple are available).
- ✅ Try replacing the cable with another one.
- ✅ Restart the device.
5.2 No Sound
- ✅ Check if the projector's volume is muted or at zero.
- ✅ Fire TV Stick: Change audio settings to "Stereo".
- ✅ PC: Change the sound output device to the projector.
- ✅ When connecting a Bluetooth speaker: Enable Bluetooth output on the projector.
5.3 Image Disturbance or Interruption
- ✅ Check the quality of the HDMI cable (for 4K, HDMI 2.0 or higher is recommended).
- ✅ For wireless connections: Switch to 5GHz WiFi.
- ✅ Reduce the distance between the projector and the router.
- ✅ Minimize interference from other WiFi devices.
Chapter 6: Summary of Recommended Connection Methods by Use Case
| Use Case | Recommended Connection Method | Reason |
|---|---|---|
| Movie Watching (High Quality) | Wired HDMI | Highest image and sound quality |
| Gaming (FPS, Fighting Games) | Wired HDMI + Game Mode | Minimal latency |
| Business Presentations | Wired HDMI or USB | Prioritizes stability |
| Sharing Smartphone Videos | Wireless Mirroring | Prioritizes ease of use |
| Local Video Playback | Direct USB Playback | No cables needed |
| Netflix, YouTube | Built-in Apps or Fire TV Stick | Simplest option |
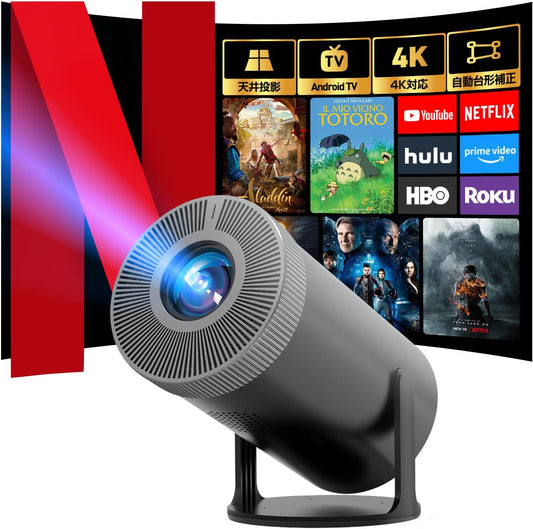
🛒 Aestiquo Projectors with Excellent Connectivity
Aestiquo Q1
Mini Projector
Mini Projector
HDMI, USB, WiFi, Bluetooth compatible
Aestiquo P1
Home Theater Projector
Home Theater Projector
HDMI 2.0, 4K, various input terminals
❓ Frequently Asked Questions
Which HDMI cable should I choose?
For Full HD (1080p), HDMI 1.4 is sufficient. For 4K/HDR, HDMI 2.0 or higher is recommended, and for 4K 120Hz gaming, a Premium High-Speed HDMI (2.1) cable is required. A length of 5m or less is recommended.
Can I connect my iPhone to a projector?
Yes, you can use a Lightning to HDMI adapter (Apple genuine recommended) for a wired connection. If your projector supports AirPlay, you can also connect wirelessly. Be aware that third-party adapters may not work.
I inserted my Fire TV Stick into the projector's HDMI, but there's no sound.
Go to Fire TV Settings → Display & Audio → Audio → Change to "Stereo". If it's set to "Dolby Digital", you might not get sound from the projector's built-in speakers.
I'm experiencing significant lag with a wireless connection. Can I improve it?
You can try switching to 5GHz WiFi, reducing the distance between the projector and the router, and minimizing WiFi usage by other devices. If these don't help, switching to a wired HDMI connection is recommended.
My video on a USB drive won't play.
Check the supported formats. MP4 (H.264) has the highest compatibility. For other formats like MKV or MOV, converting them to MP4 with a free tool like HandBrake usually resolves the issue.
The information in this article is current as of April 2026. Operating procedures may vary depending on the device's OS and firmware version.