
How to set up the projector for projection?
VBCHave you ever purchased a projector only to have trouble setting it up for the first time? Misconfigurations can result in blurry images, connection issues, and other issues that can ruin the high image quality. Beginners may find it difficult to set up a compact model in particular, as there are a wide variety of settings to choose from.
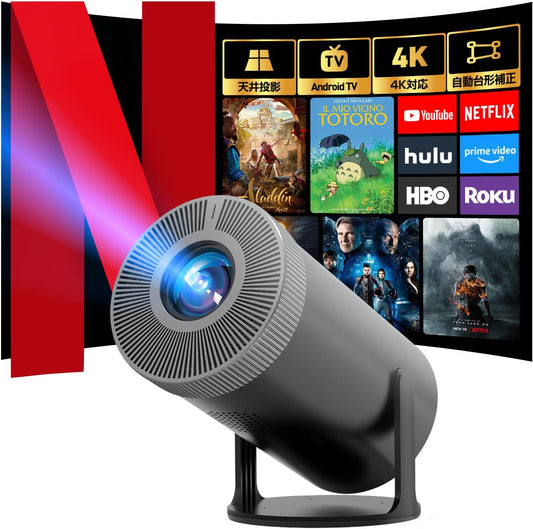
Its lightweight design of 0.52 kg makes it easy to carry, and its lamp has a long life of 100,000 hours , making it suitable for a wide range of uses, from home use to travel.
Now, let's take a look at how to set it up.
Basic connection method
Before you can use your projector, you need to make the right connections. The Aestiquo Q1 has multiple connection options, including HDMI, USB, and Wi-Fi.

- USB connection: Simply insert a USB memory stick into the USB port to play videos/photos directly.
- Wi-Fi connection: Images can be projected wirelessly from smartphones and tablets
Once the connection is complete, press the power button to start the projector. It will take a few seconds to start up, so please wait.
Focus and screen adjustment
Once the projector is up and running, the next step is to adjust the screen. First, adjust the focus, then the size, position, and aspect ratio.

- Screen size: Approximately 30 inches from a distance of 1m, and approximately 100 inches from a distance of 3m
- Keystone correction: If the screen is distorted, press the KEYSTONE button and adjust with the up, down, left, and right buttons.
Movies → 16:9, TV shows → 4:3 are common
Network Settings
By connecting Aestiquo Q1 to a network, you can enjoy online video services and wirelessly project from your smartphone.
2. Select "Settings" → "Network" → "Wi-Fi Settings"
3. Select your Wi-Fi network and enter the password

- Basic operation: Automatic setup by simply connecting a LAN cable to the projector's LAN port
- Manual setting: You can set the IP address by going to "Wired Settings" → "Manual Settings"
Optimizing image and sound quality
The Aestiquo Q1 delivers high-quality image and sound, but you can further tweak the settings to get the best experience.
- Basic adjustment: Adjust brightness, contrast, and saturation while actually viewing the image
- Preset modes: Choose from "Standard," "Movie," "Game," etc. ("Movie" mode is recommended for movies in a dark room)
- Basic adjustments: Bass, treble and volume adjustable
- Expansion options: In addition to the built-in speaker, you can also connect to a wireless speaker via Bluetooth.
Power saving settings and maintenance
- Lamp life: 100,000 hours, but requires regular maintenance
- Filter cleaning: Clean regularly to prevent dust buildup
- Installation environment: Ensure there is sufficient space around the projector and good ventilation
If any malfunction occurs, please refer to the Aestiquo Projector FAQ or contact official support.
summary
We have explained in detail how to set up the Aestiquo Q1 . From basic connections to advanced settings, you can get the best viewing experience by setting it up properly.
The lightweight design weighs just 0.52 kg, making it easy to carry when traveling or on business trips, allowing you to enjoy big-screen entertainment anytime, anywhere. It may take a little time to get used to the setup, but once you're set up, it's time to enjoy.
We hope you will enjoy a rich visual experience using Aestiquo Q1 .