
Aestiquo P1 Projector: A Complete Guide to Renewing Your Home Entertainment
Share
"My TV screen is too small, so movies don't feel as immersive," "I want to play games on a big screen, but large TVs are expensive," "I don't have anywhere to watch slideshows with my family" -- do you have any of these worries about home entertainment?
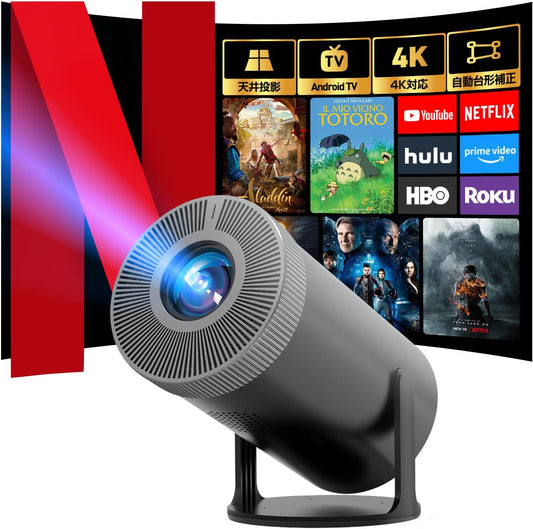
The Aestiquo P1 projector supports 1080P Full HD resolution , 700 ANSI lumens of brightness , and a 300-inch ultra-large screen , allowing you to easily create a home theater, game room, or presentation space in your living room or bedroom. This article details the P1's use cases, installation methods, and optimal peripherals to help you instantly evolve your home entertainment.
1. P1's core features for home use: Why is it chosen for home use?
The P1 is ideal for home entertainment because it combines three features: high image quality, ease of use, and versatility. Below are some of the features that are particularly useful for home use, based on the P1 manual.
① High-quality, immersive video
- Resolution : 1080P Full HD (1920 x 1080 pixels)—Clearly reproduces the fine details of DVDs and online videos (with significantly less graininess than 720P projectors)
- Brightness : 700 ANSI lumens - The screen is easy to see even in a dimly lit living room (with one fluorescent light), and at night you can enjoy cinema-like realism in the dark.
- Contrast : 3000:1 - Clear distinction between the blackness of dark scenes and the brightness of bright scenes, reproducing natural shadows in movies
- Screen size : 30-300 inches (projection distance 0.8-7.5m) - 80-120 inches for living rooms, 60-80 inches for bedrooms - freely adjustable to suit the size of your room
Tip: The optimal screen size for home use is 1.5 to 2 times the viewing distance. For example, if the viewing distance in your living room is 2.5 meters, a 100 to 120 inch screen will provide the best eye comfort and a sense of realism.
② Easy-to-use connectivity and operability for home use
| Functional classification | Specific specifications | Benefits at home |
|---|---|---|
| External device connection | HDMI 2.0 x 2, USB 2.0 x 2, AUX OUT, earphone jack | Simultaneous connection of TV boxes (Amazon Fire TV, Google Chromecast), game consoles (PS5, Switch), and smartphones (via HDMI cable) is possible. |
| Wireless Features | WiFi 5 (2.4GHz/5GHz), Bluetooth 5.0 | Cast videos from your smartphone (AirPlay and Miracast supported) and connect to wireless speakers for improved sound quality |
| Screen adjustment | Vertical ±40 degree keystone correction, zoom (100-75%), manual focus adjustment | Even if the projector is placed at an angle, the screen remains square and the screen size can be fine-tuned to fit the space in the room. |
| How to operate | Remote control, main unit buttons, smartphone app (compatible with Aestiquo Connect) | Even if you lose the remote, you can still operate it with your smartphone. The intuitive menu design makes it easy even for children to use. |
For detailed connection instructions, please refer to the Aestiquo P1 Product Manual (Connection Guide Chapter) .
3. Designed to withstand long-term use at home
- Quiet operation : 28dB (in Eco mode) - Even when used in the bedroom at night, the sound of a movie won't be disturbed (quieter than a typical silent fan)
- Long-lasting lamp : 30,000-hour LED lamp life—approximately 27 years of use with 3 hours of daily use (more than double the lifespan of a typical projector)
- Energy-saving : 120W in normal mode / 80W in eco mode - Even when used for extended periods, electricity bills remain low, reducing running costs at home.
- Compact size : 23cm wide x 18cm deep x 8cm high, weighs 1.2kg - takes up little space on a shelf or table and is stable and won't tip over accidentally
2. P1 Home Use Scenarios: Enriching Daily Entertainment
The P1 can be used in a variety of home settings, such as watching movies, playing games, and showing slideshows with the family. We will introduce the optimal settings and tips for each setting.
Scene 1: "Home Theater" in the living room
Optimal settings : Screen size 80-120 inches, picture mode "Theater mode", volume recommended when connected to external speakers
Installation and operation procedures
- Place the P1 on a table or stand in your living room and point it at a white wall or projection screen (see Choosing a Home Projection Screen ).
- Connect a TV box (e.g., Amazon Fire TV Stick) to the P1's HDMI port to access video services such as Netflix and Disney+.
- Press the "Picture Mode" button on the remote control and select "Theater Mode" (optimize contrast and color reproduction to enhance the movie's realism)
- Dim the lights in the room (turn off fluorescent lights and use only indirect lighting) - Reducing the brightness will result in deeper blacks on the screen, improving the sense of realism.
- If necessary, use the P1's Bluetooth function to connect a wireless speaker (e.g. Sony wireless speaker ) to improve sound quality.
Tip: If movie subtitles are small and difficult to read, try using the P1's "Subtitle Enlargement" function (Menu → Picture Settings → Subtitle Adjustment). You can enlarge the subtitles up to 2x, making them easier for the elderly and children to see.
Scene 2: "Game Room" in the Bedroom
Optimal settings : Screen size 60-80 inches, Picture mode "Game Mode", Input lag "Low Latency Mode" (≤20ms)
Installation and operation procedures
- Place the P1 on a bedside table in your bedroom and project onto the wall opposite the bed (ideal viewing distance: 1.5-2m)
- Connect your game console (PS5, Xbox Series X, Switch) to the P1's HDMI 2.0 port. HDMI 2.0 supports 4K/60fps, reproducing smooth motion in high-definition games.
- On your remote, go to "Menu Button" → "System Settings" → "Game Settings" and turn on "Low Latency Mode" - this reduces input lag to under 20ms, speeding up on-screen response to your inputs and improving gameplay.
- Switch the picture mode to "Game Mode" - set the brightness higher and reduce motion blur, so you can see enemy movements clearly in action games.
- Use headphones (e.g., Bose noise-canceling headphones ) to hear your gameplay—this will help you avoid disturbing your family even when gaming at night.
Note: When connecting a game console to the P1, please use a "high-speed HDMI cable" (compatible with HDMI 2.0 or higher). Using a low-speed cable may result in poor performance in high-definition games.
Scene 3: Family "Slideshow Education"
Optimal settings : Screen size 70-90 inches, picture mode "Standard mode", brightness set to 70% or higher
Installation and operation procedures
- Place the P1 on the table in the center of the living room and project it onto the wall where all the family can see it.
- To play a slideshow, connect a USB memory stick (saving JPEG image files) to the P1's USB port, or use the "cast" function on your smartphone to project a photo album.
- To play educational videos for children, connect a tablet (iPad or Android tablet) to the P1 with an HDMI cable and project content from YouTube Kids or educational apps.
- Set the picture mode to "Standard Mode" and adjust the brightness to 70% or more - the image will be clear even in a bright room during the day, and the brightness will be gentle on children's eyes.
- You can set the P1's "Timer" function (Menu → System Settings → Timer) to limit the amount of time the device spends watching educational videos (e.g., automatically turning off after 30 minutes)—helping to protect your child's eyesight.
For educational content at home, you can find safe videos on the official YouTube Kids channel .
3. P1 Home Installation Guide: Easy Setup Even for Beginners
P1 installation can be completed in 5 steps, even if you are not an expert. Please follow the steps below to ensure proper installation.
Step 1: Choose a location
1. Measure the distance from the wall or screen you want to project onto and determine the installation position based on the desired screen size (e.g., for an 80-inch screen, the projection distance is approximately 2 m).
② Choose a level and stable surface (table, shelf, dedicated stand) to install the P1 and make sure it does not tilt. ③ Avoid locations exposed to direct sunlight or air conditioning (this can make the screen difficult to see and can cause the device to overheat).
Step 2: Connect power and external devices
1. Insert the P1's power cable into the "AC IN" port on the main unit, and connect the other plug to a household outlet (AC 100V~240V). 2. Connect any necessary external devices (TV box, game console, smartphone) to the P1 with an HDMI cable or USB cable. 3. If you want to use external speakers, connect an AUX cable to the P1's "AUX OUT" port, or pair them via Bluetooth.
Tip: If you connect multiple external devices, label the HDMI ports to distinguish them (e.g., HDMI1=TV box, HDMI2=game console) to avoid confusion when switching between them.
Step 3: Turn on the power and calibrate the screen
① Press the power button on the P1 to start it up (it takes about 30 seconds to start up)
② Press the "Input Switch" button on the remote control and select the input source (HDMI1, HDMI2, USB) of the connected external device. ③ Adjust the screen position and size:
- Correct screen distortion with the "Keystone Correction Button" (adjustable within a range of ±40 degrees vertically)
- Use the "Zoom button" to fine-tune the screen size (100-75%)
- Turn the focus ring on the camera to make the image clearer.
Step 4: Optimize image and sound
① Press the "Picture Mode" button on the remote control and select the mode that suits your situation (Theater, Game, Standard, Bright)
② Adjust "Brightness," "Contrast," and "Saturation" to achieve your desired image quality (detailed adjustments can be made in Menu → Image Settings)
3. Adjust the volume, and if you're using external speakers, adjust the speaker volume accordingly—make sure the volume isn't too loud and disturbs your neighbors.
Step 5: Save and confirm
① Save the adjusted image and audio settings in "User Mode" (Menu → System Settings → Save Settings) - the same settings will be available the next time you start up. ② Start playback on an external device and check that the image and audio are output correctly. ③ Do not place obstacles around the unit to prevent the P1 from accidentally falling over - this is especially important in homes with children or pets.
4. P1 Home Use Troubleshooting: Common Problems and Solutions
If you encounter problems such as a dark screen or no sound when using the P1 at home, please refer to the FAQ below to troubleshoot the issue.
- Q: The screen is dark and hard to see in a bright room during the day.
- A: Adjust brightness-related settings to improve the environment:
1. Select "Bright Mode" using the "Picture Mode" button on the remote control - increase the brightness up to 80% to make the screen easier to see in bright environments. 2. Install blackout curtains (e.g., Nitori blackout curtains ) on the room's windows to block direct sunlight - sunlight hitting the screen reduces contrast and makes it difficult to see. 3. Slightly shorten the P1's projection distance - reduce the screen size and increase the relative brightness per unit area. 4. Use a projection screen - a dedicated screen reflects light more easily than a white wall, improving the screen's brightness and contrast (high-gain screens are particularly suitable for bright environments). - Q: When I connect an external device (game console, TV box), it doesn't appear on the screen.
- A: Check the connection status and input source:
① Check that the HDMI cable connections (P1 side and device side) are not loose and reinsert them firmly - poor contact is the most common cause. ② Check that the connected HDMI port (HDMI1/HDMI2) is correctly selected using the "Input Switch Button" on the remote control (e.g., the input source is set to HDMI1 even though a game console is connected to HDMI2).
3. Check that the external device is turned on (if the device is turned off, no signal will be sent to P1 and no image will be displayed on the screen).
④ Check if the HDMI cable is broken - try replacing it with a working HDMI cable (especially old cables, as the internal wiring may be broken).
5. Power off the P1, wait 30 seconds, then power it back on again - this may resolve temporary signal reception errors. - Q: The screen response is slow when playing games (there is input lag)
- A: Adjust the low latency settings and picture mode:
1. Turn on the P1's "Low Latency Mode" (Menu → System Settings → Game Settings) - this will reduce input lag to under 20ms, improving synchronization between your controls and the screen. 2. Switch the picture mode to "Game Mode" - "Theater Mode" and "Standard Mode" require more time for image processing, which can increase input lag. 3. Turn off "Video Stabilization" (e.g., Motion Smooth, Dynamic Contrast) - these functions can also increase input lag. 4. Replace your HDMI cable with a "High Speed HDMI Cable" (compatible with HDMI 2.0 or higher). Low-speed cables have a slower signal transmission speed, which can cause input lag. - Q: After using the P1 for a long time, the body of the device becomes hot and suddenly shuts off.
- A: Improved heat dissipation:
① Make sure the P1's ventilation holes (on the sides and back) are not blocked. If a cloth or book is placed over the ventilation holes, the internal heat will not be released and the device will overheat, causing it to automatically shut off due to a protection function. (Please ensure there is at least 10cm of free space around the P1.)
② Check that the room temperature is not too high (e.g., in a closed room in summer). If the room temperature exceeds 35°C, the P1's heat dissipation efficiency will decrease. Adjust the room temperature to 25-30°C with an air conditioner. ③ Check that the P1's fan is rotating normally. If dust accumulates in the fan, it will slow down and cause poor heat dissipation. Remove dust from the unit's ventilation holes with an air duster (see the Aestiquo P1 Maintenance Guide ).
④ Use "Eco Mode" - Eco Mode reduces power consumption and heat generation, making it suitable for long-term use (Menu → Power Settings → Eco Mode ON)
5. The perfect accessories for the P1: Enhance your home entertainment
While the P1 alone provides a sufficient home entertainment experience, combining it with the right peripherals can further improve the picture quality, sound quality, and ease of use. Below are some recommended peripherals.
① Home projection screen
Recommended reason : Significantly improves screen brightness, contrast, and color reproduction compared to a white wall, especially in a brightly lit room.
Tips for choosing : Size (80-120 inches), installation method (retractable/tabletop), gain (1.2-1.5x: suitable for bright environments).
Recommended product example : VIVOHOME Roll-up Projection Screen (easy to store, suitable for small living rooms)
② Wireless speaker/sound bar
Reason for recommendation : Movie sound effects and game sounds are more powerful than the P1's built-in speakers (2W x 2ch).
Tips for choosing : Bluetooth compatibility, output (20W or more), size (suitable for living room space).
Recommended product example : Sony HT-S200F Soundbar (compact and easy to reproduce movie bass)
③ Projector stand
Recommended reason : It saves table space and allows you to freely adjust the projection angle of the P1, which is especially convenient when placed on the living room floor.
Tips for choosing : Height adjustment function (30-50cm), stability (load capacity of 1.5kg or more), foldable (easy to store).
Recommended product example : ELECOM PJ-DSFXBK projector stand (height adjustable, compact storage)
④ High-speed HDMI cable (2.0 or higher)
Recommended reason : Achieves high image quality (4K/60fps) and low latency when connected to game consoles or 4K TV boxes.
Tips for choosing : Standard (HDMI 2.0 or higher), length (2-3m: to suit the installation distance at home), flexibility (able to withstand long-term use).
Recommended product example : Monoprice Ultra Slim HDMI 2.0 Cable (2m) (Thin and flexible, easy to organize)
⑤ Remote control protective case
Recommended reason : Protects the P1 remote control from dirt and drops, especially necessary in homes with children.
Tips for choosing : Material (silicone: good slip resistance and shock absorption), size (specific for P1 remote control or general-purpose size), transparency (you can see the remote control buttons).
Recommended product example : Water Light. Easy to install, prevents dirt, etc. Remote control cover, silicone type, large size. Compatible with TV, DVD, etc. remote controls (highly versatile and inexpensive).
6. Summary: The Aestiquo P1 brings "evolution of entertainment" to the home
The Aestiquo P1 projector is a home product that combines high image quality, ease of use, and versatility, and can be used in a variety of situations, such as a home theater in the living room, a game room in the bedroom, or an educational/slideshow space for the family.
Three key points for using the P1 at home
- Adjust the settings to suit the scene <br>Use "Theater Mode" for watching movies, "Low Latency Mode + Game Mode" for gaming, and "Standard Mode + High Brightness" for education - by selecting the optimal settings for each scene, you can maximize the P1's performance.
- Enhance your experience by combining with peripherals <br>Improve image quality with a projection screen, enrich sound quality with a sound bar, and increase installation flexibility with a stand - choosing the right peripherals will instantly improve the immersive feel of your home entertainment.
- Extend the lifespan with regular maintenance <br>By performing simple maintenance such as removing dust from the ventilation holes, leaving space around the lamp, and using eco mode, you can make the most of the P1's LED lamp lifespan (30,000 hours) and enjoy comfortable use for a long time.
The Aestiquo P1 is a "new entertainment center for the home," more economical and flexible than a large TV, allowing you to enjoy big-screen entertainment even in a small room. Please follow the guidelines in this article and renew your home entertainment with the P1.