
The Ultimate Guide to Watching TV on a Projector: Your Door to a Cozy Movie Experience
えい ほうIn recent years, projectors have become increasingly popular in homes due to the demand for larger screens. Compared to televisions, projectors offer advantages such as a large screen of over 100 inches in a compact size, greater flexibility in installation, and a sense of realism even in dark environments, revolutionizing the way people watch TV in their living rooms and bedrooms.
However, many people may have questions like, "How do I watch TV on a projector?" or "I don't know how to connect the signal." This guide provides detailed explanations of the basic connection methods, points to consider when choosing equipment, and tips for improving your viewing experience. It also provides specific operation examples using Aestiquo's popular projector ( Aestiquo P1 ), helping even beginners easily enjoy the big-screen TV experience.
1. Basic method for watching TV on a projector
There are three main ways to watch TV on a projector. Choose the method that best suits your device (cable TV receiver, streaming box, or smartphone).
1.1 Connecting cable TV signals
If you already have cable TV, you can watch TV programs by connecting your cable TV receiver (set-top box) directly to the projector. The connection steps for the Aestiquo P1 are shown below.
Step 1: Prepare the necessary equipment
- Projector (e.g. Aestiquo P1)
- Cable TV set-top box (receiver provided by the cable company)
- High-speed HDMI cable (HDMI 2.0 or higher recommended. For Aestiquo P1, you can use the included HDMI cable)
- Cable TV signal cable (not necessary if already connected to a set-top box)
Step 2: Connect the set-top box to the projector
- Connect the cable TV signal cable to the "signal input port" on the set-top box (skip if already connected).
- Insert one end of the HDMI cable into the "HDMI output port" on the set-top box.
- Insert the other end of the HDMI cable into the "HDMI 1" or "HDMI 2" port on the Aestiquo P1 (there are two HDMI ports on the back of the P1).
Note: Make sure the HDMI cable is inserted securely. Poor contact may result in no image being displayed or distorted picture quality.
Step 3: Power on and switch signal source
- Turn on the set-top box and then turn on the Aestiquo P1 (press the power button on the P1 itself or the power button on the remote control).
- Press the "Input Switch Button" on the P1 remote control and select the connected HDMI port ("HDMI 1" or "HDMI 2").
- After a few seconds, the TV signal from the set-top box will be transmitted to P1 and the TV program will appear on the screen.
Tip: You can use the Aestiquo P1's "Input Memory" function to automatically select the last used HDMI port the next time you start up. For instructions on how to set it up, please refer to the "System Settings" chapter in the Aestiquo P1 product manual .
1.2 Watching through a streaming box
If you use video streaming services such as Netflix, Disney+, or Amazon Prime Video, or terrestrial TV video streaming apps (e.g., NHK On Demand), it's convenient to connect a streaming box (Amazon Fire TV Stick, Google Chromecast, etc.) to the projector. The Aestiquo P1 also allows you to connect some streaming boxes wirelessly via Bluetooth.
Step 1: Prepare the necessary equipment
- Projector (Aestiquo P1)
- Streaming box (e.g. Amazon Fire TV Stick 4K)
- A high-speed HDMI cable (if your streaming box has an HDMI port; some models have a built-in HDMI port)
- WiFi environment (required for streaming content)
- A video streaming service account (register in advance)
Step 2: Connect the streaming box to the projector
The connection method varies depending on the type of streaming box. We will introduce two methods: wired and wireless.
■ Wired connection (using an HDMI cable)
- Connect one end of the HDMI cable to the HDMI output terminal of the streaming box (in the case of the Amazon Fire TV Stick, the body is shaped like an HDMI plug, so it can be inserted directly into the HDMI port on the P1).
- Connect the other end of the HDMI cable to the HDMI port (HDMI 1/HDMI 2) on the Aestiquo P1.
- Power on your streaming box (some models are powered by the HDMI port, so they will power up automatically when you start the projector).
■ Wireless connection (Bluetooth: Aestiquo P1 only)
- On the Aestiquo P1 remote control, select "Menu" → "Settings" → "Bluetooth Settings" and turn Bluetooth ON.
- Turn on the Bluetooth function of the streaming box, select "Aestiquo P1" from the device list and pair it.
- When pairing is complete, the P1 screen will display "Bluetooth connection successful."
Step 3: Log in to your video streaming service and watch
- Switch the input source of the Aestiquo P1 to "HDMI" (when connected via wired connection) or "Bluetooth" (when connected wirelessly).
- Use the screen controls on your streaming box to launch the desired video streaming app (e.g., Netflix).
- Log in by entering the account information you previously registered in the app.
- Select the TV program you want to watch (drama, variety, news, etc.) and play it. Turning on the Aestiquo P1's "Theater Mode" optimizes contrast and color reproduction for a truly immersive viewing experience.
1.3 Use smartphone screen mirroring
You can also use screen mirroring (screen sharing) to project the screen of a TV streaming app installed on your smartphone (e.g., TBS Video, Fuji TV On Demand). The Aestiquo P1 supports both AirPlay (iPhone/iPad) and Miracast (Android devices), so it can be connected to most smartphones.
Step 1: Connect the projector and your smartphone to the same WiFi network
To use Screen Mirroring, your Aestiquo P1 and smartphone must be connected to the same WiFi router.
- On the Aestiquo P1 remote control, select "Menu" → "WiFi Settings" and enter your home WiFi network name and password to connect.
- On your smartphone, go to "Settings" → "WiFi" and connect to the same WiFi network as P1.
Step 2: Launch the screen mirroring function on your smartphone
The procedure for screen mirroring differs between iPhone and Android devices. The procedures for each are explained below.
■ iPhone/iPad (using AirPlay)
- Swipe up from the bottom of your iPhone screen to display the Control Center (on iPhone X and later, swipe down from the top right of the screen).
- Tap the "Screen Mirroring" icon.
- Select "Aestiquo P1" from the device list.
- After a few seconds, your iPhone screen will be projected onto the Aestiquo P1.
■ Android device (using Miracast)
- On your Android device, go to "Settings" → "Display" → "Screen Mirroring" (or "Wireless Display") (the name may vary depending on the manufacturer).
- Turn on "Screen Mirroring" and select "Aestiquo P1" from the device list.
- When a connection request appears, tap "OK" and the screen of your Android device will be projected onto the P1.
Step 3: Launch the TV streaming app and watch
- Launch the TV streaming app (e.g., NHK On Demand, AbemaTV) installed on your smartphone.
- Select the TV program you want to watch in the app and play it. The smartphone screen is projected onto the P1, so the program image is also displayed on the large screen at the same time.
- You can adjust the volume using the Aestiquo P1 remote control or the volume buttons on your smartphone. The P1's built-in speakers (5W x 2ch) provide sufficient sound quality, but connecting a wireless speaker will further enhance the sense of realism.
Tip: If your WiFi environment is unstable during Screen Mirroring, the image may be interrupted. To improve stability, try placing your WiFi router closer to your projector and smartphone, or using 5GHz WiFi.
2. How to connect and configure different types of projectors
Projectors can be broadly categorized into "smart projectors" and "regular projectors," each with different connection methods and settings. The Aestiquo P1 is classified as a "smart projector" and is equipped with its own OS (Android TV), which allows you to use some TV streaming apps without connecting an external device.
2.1 Smart Projector (Taking Aestiquo P1 as an example)
Smart projectors have a built-in OS and Wi-Fi functionality, so you can download video streaming apps directly and watch TV without connecting an external device (streaming box, smartphone). We'll explain how to set up the Aestiquo P1 in detail below.

Aestiquo P1's Smart Features
- OS: Android TV 11.0 (Google certified)
- Pre-installed apps: Google Play Store, YouTube, Netflix (in some regions)
- Connectivity: WiFi 5 (2.4GHz/5GHz), Bluetooth 5.0, HDMI 2.0 x 2
- Operation method: Remote control, smartphone app (Aestiquo Connect), voice control (compatible with Google Assistant)
Step 1: Install a video streaming app on your Aestiquo P1
- Turn on the Aestiquo P1 and tap the "Google Play Store" icon from the home screen.
- Log in with your Google account (only required the first time you use it. Skip if you are already logged in).
- Enter the name of the video streaming app you want to watch (e.g., "NHK On Demand" or "AbemaTV") in the store's search field and search.
- Select the app you want from the search results and tap the "Install" button. The app will automatically begin downloading and installing.
- Once the installation is complete, the app icon will appear on the P1 home screen.
Step 2: Log in to the app and watch TV shows
- Tap the video streaming app you installed on the P1 home screen to launch it.
- Follow the app's initial settings and enter your account information (email address, password) to log in. Some apps offer a feature that allows you to easily log in using a QR code.
- Select the content you want to watch (e.g., a TV series, breaking news) from the "TV Programs" category within the app and play it.
- To adjust the "Picture Mode" while watching, press the "Picture Button" on the P1 remote control and select "Theater Mode" (for dark rooms) or "Bright Mode" (for dimly lit rooms).
Step 3: Search for TV shows with your voice (optional)
The Aestiquo P1 is compatible with Google Assistant, so you can search for TV programs by voice by pressing the microphone button on the remote control.
- Press and hold the "microphone button" on the P1 remote control.
- Speak commands such as "Play NHK news" or "I want to watch last night's Fuji TV drama."
- Google Assistant will recognize your voice and search for and play the TV show, or recommend related apps.
Tip: Voice control is available in Japanese, but recognition accuracy may be reduced in loud ambient noise. For best results, use in a quiet environment.
2.2 General projectors (non-smart type)
Regular projectors (non-smart types) do not have a built-in OS or Wi-Fi functionality, so you must connect an external device (cable TV set-top box, streaming box, smartphone) to watch TV. The connection method is almost the same as that introduced in "1. Basic Method for Watching TV on a Projector," but we will add some points to keep in mind.
General projector considerations:
- "Input switching": For non-smart projectors, after connecting an external device, you must manually switch the input source, such as "HDMI" or "USB," using the remote control. Some models have an automatic input detection function, but this can take some time.
- "Resolution Support": Some older projectors only support 720P (HD) resolution, which can result in poor image quality when playing 4K TV programs. Matching the resolution settings of the connected external device to that of the projector (e.g., 720P) will result in a clearer image.
- "Power Supply": External devices such as streaming boxes may be able to receive power from the projector's USB port, but some high-power devices require a separate AC adapter. Please check the power specifications of the external device before connecting it.
Step 1: Connect external devices to the projector
Below is an example of a typical connection between a projector and a cable TV set-top box.
- Connect one end of the HDMI cable to the HDMI output port on your cable TV set-top box.
- Connect the other end of the HDMI cable to the HDMI input port of a standard projector.
- Turn on the projector and the set-top box.
Step 2: Switch input sources to watch TV
- Press the "Input" button on the projector's remote control.
- Select "HDMI" from the list of input sources that appears (if the connected HDMI port number is displayed, select that number).
- Use the set-top box remote control to select a channel and watch the TV program you want.
- To adjust the screen brightness and contrast, go to "Menu" → "Image Settings" on the projector's remote control and change the settings. It is common to adjust the brightness to 50-70% in a dark room and 80-100% in a bright room.
3. Things to note when watching TV on a projector
When watching TV on a projector, you can use it comfortably for a long time by understanding points such as "adjusting the brightness," "selecting the installation location," and "regular cleaning." Below are three important points to keep in mind.
3.1 Adjusting brightness and contrast
The quality of a projector screen is greatly affected by the brightness of the surrounding area, so it is very important to adjust the brightness and contrast to suit the viewing environment.Television programs in particular require optimal settings because they contain a mixture of bright scenes (outdoor news broadcasts) and dark scenes (nighttime drama scenes).
Optimal settings for different listening environments (based on Aestiquo P1):
| Viewing environment | Brightness (luminance) | contrast | Recommended image modes | supplement |
|---|---|---|---|---|
| Dark room (nighttime, blackout curtains closed) | 50-60% | 70~80% | Theater Mode | Deeper blacks in dark scenes for a more realistic feel |
| Dimly lit room (dusk, blackout curtains half open) | 70~80% | 60-70% | Standard Mode | Good balance between bright and dark scenes |
| Bright room (daytime, blackout curtains open) | 90~100% | 50-60% | Bright Mode | Lower the contrast slightly to prevent whiteout on the screen |
For the Aestiquo P1, you can turn on the "Auto Brightness Adjustment" function, which uses a sensor to detect the ambient brightness and automatically adjust the brightness. To set it, simply go to "Menu" → "Picture Settings" → "Auto Brightness" and turn it on. This ensures that the screen always maintains optimal brightness even if the ambient brightness changes while you are watching (for example, if the room gets dark at dusk).
3.2 Selecting the installation location
The installation location of a projector will affect the screen size, viewing distance, and heat dissipation efficiency, so you should consider the following points when selecting the location.
Points to consider when selecting an installation location:
- "Projection Distance and Screen Size": The screen size is determined by the distance from the projector to the projection surface (wall or screen). With the Aestiquo P1, a projection distance of 1.5m will produce a screen size of approximately 60 inches, and a projection distance of 2.5m will produce a screen size of approximately 100 inches. The ideal viewing distance is 1.5 to 2.5 times the screen diagonal (e.g., for a 100-inch screen, a viewing distance of 1.8 to 3m is required).
- "Avoid direct sunlight": If direct sunlight hits the projection surface of the projector, not only will it be difficult to see the screen, but it will also make the projector body more susceptible to heat. Choose a location where it will not be exposed to direct sunlight from a window, and use blackout curtains if necessary.
- "Ensure there is enough space for heat dissipation": The projector will heat up over time, so you need to ensure there is at least 10cm of free space around the ventilation holes (on the side of the Aestiquo P1). If the ventilation holes are blocked by a wall or furniture, poor heat dissipation may cause the overheating protection function to be activated, resulting in a sudden power outage.
- "Install on a level surface": Installing the projector on an inclined surface can easily cause trapezoidal distortion on the screen. The Aestiquo P1 is equipped with a vertical ±40° keystone correction function, but installing it on a level surface makes adjustments easier.
Example of setup in a living room: Project the image onto the wall opposite the sofa, either on top of a TV stand or using a dedicated projector stand (e.g., ELECOM TP-ST01 ). This allows you to enjoy TV at an appropriate viewing distance from the sofa.
3.3 Regular cleaning
When using a projector for a long period of time, dust can easily accumulate on the lens and ventilation holes, causing a decrease in image clarity and poor heat dissipation. Regular cleaning can maintain the performance of the projector and extend its lifespan.
Step 1: Clean the lens
Dust accumulation on the lens can cause blurry images and ghosting. Here's how to clean it:
- Turn off the projector and allow it to cool completely (at least 30 minutes).
- Use a special lens cleaning wiper (e.g. Carl Zeiss lens cleaner ) or prepare a soft, lint-free cloth.
- Gently wipe the surface of the lens in a circular motion from the center outwards, being careful not to rub too hard (this can remove the lens coating).
- If there is any stubborn dirt, wipe it off with a cloth moistened with a small amount of lens cleaning solution, being careful not to let excess solution get inside the lens.
DON'T: Do not use chemicals such as glass cleaner or alcohol, as they may damage the lens coating.
Step 2: Cleaning the vents and filters
If dust accumulates in the vents or internal filters, the heat dissipation efficiency will decrease and the device will be prone to overheating. Here's how to clean your Aestiquo P1:
- Turn off the projector and unplug it from the outlet.
- Use a can of compressed air to blow away any dust from the vents on the side of the device. Be careful not to hold the nozzle of the can of compressed air too close to the vents (keep it about 10cm away) to avoid pushing the dust inside.
- Remove the "filter cover" on the bottom of the Aestiquo P1 and take out the internal dust filter.
- Gently brush off dust from the filter with a soft brush (e.g., a pen brush) or wash it under running water (after washing, allow it to dry completely before reinstalling it).
- After cleaning, put the filter back in place and close the filter cover.
Cleaning frequency: We recommend cleaning the filter once a month in most cases, or once every two weeks in dusty environments (if you have pets or linoleum floors). The Aestiquo P1's "Filter Warning" feature will notify you when the filter is dirty, allowing you to determine when it's time for cleaning.
4. Projector vs. TV
Before watching TV on a projector, it's important to compare the advantages and disadvantages of projectors and regular TVs to choose the device that best suits your needs. Below, we'll compare them from four perspectives: picture quality and brightness, difficulty of installation, price and cost, and ease of use.
4.1 Image quality and brightness
Picture quality and brightness are key elements of TV viewing. Here are the key features of projectors and TVs:
| Comparison items | Projector (using Aestiquo P1 as an example) | Regular TV (55-inch 4K model as an example) |
|---|---|---|
| resolution | 1080P Full HD (4K is supported on some high-end models). The Aestiquo P1 is 1920 x 1080 pixels, allowing it to reproduce the fine details of TV programs. | 4K UHD (3840 x 2160 pixels) is the mainstream, but 8K models are also becoming popular, offering ultra-high definition image quality. |
| Brightness | 700 ANSI lumens (Aestiquo P1) - enough brightness for a dark room, but may be difficult to see in a bright room (blackout curtains required). | 500~800 cd/m². The screen is clear even in a bright room and is highly visible even in direct sunlight. |
| contrast | 3000:1 (Aestiquo P1). In a dark room, the blacks are deep and realistic, but the contrast tends to decrease in a bright room. | 1,000,000:1 (for OLED TVs). Self-emitting pixels allow for perfect black reproduction and excellent gradation between light and dark areas. |
| viewing angle | A wide viewing angle (approximately 160 degrees) is ensured, and there is little variation in screen color and brightness even when multiple people are watching. | LCD TVs can have a narrow viewing angle (about 120 degrees) which can cause the screen to appear blurry, but OLED TVs have a wide viewing angle. |
How to Choose: A projector is a good choice if you want a large screen for a dark room, while a TV is better for a bright room or if you want ultra-high definition (4K or higher) images. The Aestiquo P1 offers 1080P image quality, but its 700 ANSI lumens brightness improves visibility in dimly lit rooms.
4.2 Difficulty of installation
The difficulty of installation will vary depending on the size, weight and wiring complexity of the equipment.
| Comparison items | Projector (using Aestiquo P1 as an example) | Regular TV (55-inch 4K model as an example) |
|---|---|---|
| Size and Weight | Dimensions: 23cm wide x 18cm deep x 8cm high, weight: 1.2kg (Aestiquo P1). Compact and lightweight, it can be easily placed on a TV stand or shelf. | It measures 123cm wide x 71cm high x 5cm deep and weighs 15kg. Because it is large and heavy, you will need special mounting hardware to hang it on the wall. |
| The need for a projection surface | Requires a wall or dedicated projection screen. A blank wall will work, but a flat surface is ideal to avoid distortion. | The unit itself is the display surface, so no projection surface is required. It can be used as long as there is a power source at the installation location. |
| Wiring complexity | An HDMI cable is required to connect external devices (such as a streaming box), but the Aestiquo P1 supports Bluetooth and WiFi, so you can also connect wirelessly. | A power cable and an HDMI cable for external devices are required. If you are wall-mounting the unit, you may need to install additional wiring to hide it. |
| Screen adjustment | The Aestiquo P1 is equipped with a ±40° vertical keystone correction function, so the screen can be adjusted to a square even when installed at an angle. The focus can also be easily adjusted manually. | No screen adjustment is required. Just set it up, turn it on and you can start watching immediately. |
Projector installation precautions: If you are hanging the projector from the ceiling, you will need a dedicated hanging bracket (e.g., projector hanging bracket ), and installation may require specialized knowledge. Beginners are recommended to start with a tabletop installation.
4.3 Price and Cost
You need to compare not only the initial purchase price but also the maintenance costs required for long-term use.
| Comparison items | Projector (using Aestiquo P1 as an example) | Regular TV (55-inch 4K model as an example) |
|---|---|---|
| Initial Purchase Price | Approximately 70,000 yen (Aestiquo P1). The unit price for a large screen of 100 inches or more is lower than that of a television. | Approximately 80,000 to 150,000 yen (LCD TV), approximately 200,000 yen or more (OLED TV). The larger the screen size, the higher the price. |
| Maintenance costs | The LED light source has a lifespan of 30,000 hours (Aestiquo P1). If used for 3 hours per day, it will last for approximately 27 years, so there is almost no cost to replace the light source. However, there may be a cost to replace the dust filter (approximately 1,000 yen per filter). | The lifespan of a backlight (LCD TV) is 60,000 hours. If the backlight breaks down, repair costs are high (approximately 30,000 to 50,000 yen). OLED TVs have a risk of burn-in, which can cause image quality degradation if the same image is displayed for a long time. |
| power consumption | Normal mode 120W, Eco mode 80W (Aestiquo P1). If used for 3 hours a day, the monthly power consumption will be 7.2 to 10.8 kWh, and the electricity bill will be approximately 216 to 324 yen (1 kWh = 30 yen). | A 55-inch 4K LCD TV used for 3 hours a day consumes approximately 13.5kWh of electricity per month, costing approximately 405 yen. An OLED TV consumes approximately 18kWh of electricity, costing approximately 540 yen. Projectors are more energy-efficient. |
| Additional costs | You may need to purchase a projection screen (approximately 10,000 to 30,000 yen) and a projector stand (approximately 5,000 yen), but this is not required. | You may need to purchase a wall mount (approximately 10,000 yen) and a soundbar (approximately 20,000 to 50,000 yen), but this is not required. |
Cost Benefits: If you plan to use a large screen (over 100 inches) for a long period of time, a projector offers advantages in both initial purchase price and maintenance costs. The Aestiquo P1's Eco Mode can further reduce your electricity bill.
4.4 Ease of use
Convenience of use has a big impact on your everyday viewing experience. Here are some key features of projectors and TVs:
| Comparison items | Projector (using Aestiquo P1 as an example) | Regular TV (55-inch 4K model as an example) |
|---|---|---|
| Startup time | The Aestiquo P1 takes about 30 seconds to start up and about 10 seconds to recover from standby mode. | Start-up time is approximately 5 to 10 seconds. Recovery from standby mode is instant. |
| How to operate | The Aestiquo P1 supports remote control, smartphone app (Aestiquo Connect), and voice control (Google Assistant). The intuitive menu design makes it easy to operate even for beginners. | Operated with the remote control and buttons on the unit. Some high-end models support voice control (Amazon Alexa, Google Assistant). |
| multifunctionality | The Aestiquo P1 is equipped with Android TV, offering a variety of features such as the ability to install video streaming apps, connect to Wi-Fi, and connect to Bluetooth speakers. It also comes with a gaming mode (low latency ≤ 20ms), allowing you to enjoy games. | Equipped with smart TV functions, it offers the ability to install video streaming apps, Wi-Fi connection, etc. Some models are equipped with advanced features such as recording functions and HDR compatibility. |
| Storage capacity | The Aestiquo P1 is compact and can be easily stored on a shelf or in a storage box when not in use, making efficient use of space. | It is large and heavy, making it difficult to store and requiring a fixed installation location. |
| Game Compatible | Aestiquo P1's low latency mode (≤20ms) is ideal for action and racing games, and playing games on a larger screen enhances the sense of realism. | Many 4K TVs feature a low latency mode (≤10ms) for better gaming experience, while HDR models offer richer color reproduction in games. |
Restrictions on projector use: Visibility in a bright room is inferior to that of a television, so blackout curtains are required when using the projector near a window during the day. Also, the projector generates heat over long periods of use, so you'll need to leave space around any ventilation openings.
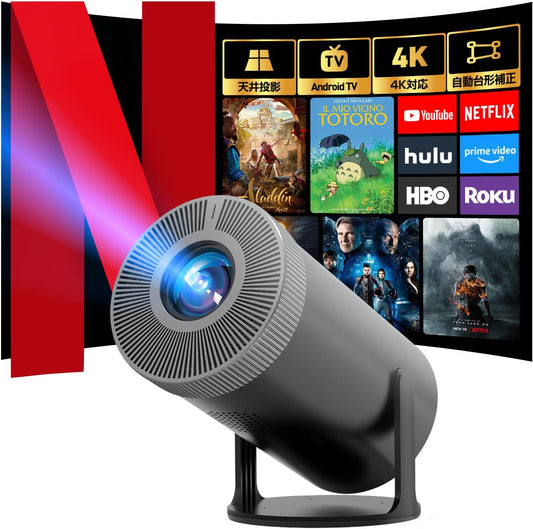
5. Aestiquo projector product introduction
Aestiquo is a brand that develops and sells home projectors, and develops products based on the concepts of "compactness," "high image quality," and "energy saving." The Aestiquo P1 in particular is a popular model that is equipped with functions optimized for watching TV, enabling large-screen entertainment at home.
Aestiquo P1
Front and side product images
Key Features and Functions of the Aestiquo P1
- Picture quality : 1080P Full HD resolution, 700 ANSI lumens, 3000:1 contrast ratio. 92% sRGB wide color gamut faithfully reproduces the colors of TV programs.
- Connectivity : HDMI 2.0 x 2 (supports 4K/60fps), WiFi 5 (2.4GHz/5GHz), Bluetooth 5.0. Easily connect to external devices and wireless speakers.
- Smart Features : Equipped with Android TV 11.0 and compatible with the Google Play Store. Video streaming apps such as Netflix, YouTube, and NHK On Demand can be installed directly.
- Energy-saving : 120W in normal mode, 80W in eco mode. LED light source life is 30,000 hours, reducing electricity and maintenance costs even over long-term use.
- Easy to use : ±40° vertical keystone correction, manual focus, and smartphone app operation. Easy to set up and adjust, even beginners can use it right away.
5.1 Customer Testimonials
Here are some actual customer reviews of the Aestiquo P1.
Customer A (male, 30s) : "I bought the P1 so I could watch TV dramas on the large 100-inch screen in my living room. Using theater mode in a dark room provides good contrast and a sense of realism. I also like the fact that it's easy to mirror my smartphone screen, so I can share videos I took on trips with my family on the big screen."
Customer B (female, 40s) : "We use the P1 to show educational videos to our children. The screen is clear even in bright mode, and we can adjust the brightness to a level that is gentle on children's eyes. Using eco mode keeps electricity costs down, so it's safe to use every day. The remote control is easy to use, and even children can operate it themselves."
Customer C (male, 20s) : "I chose the P1 so I could enjoy both games and TV. When I play the PS5 in low latency mode, the screen responds quickly to my input, providing operability that's comparable to that of a TV. I can also connect wireless headphones via Bluetooth, so I can watch at night without disturbing my family."
6. Summary
There are three ways to watch TV on a projector: connecting to a cable TV signal, connecting to a streaming box, or mirroring your smartphone screen. You can choose the method that best suits your device. Smart projectors like the Aestiquo P1 have Android TV built into the projector, so you can use video streaming apps directly without connecting an external device, making TV viewing even easier.
When watching TV on a projector, it's important to adjust the brightness and contrast to suit your viewing environment, choose a location that's not exposed to direct sunlight, and regularly clean the lens and filter. By following these tips, you can enjoy your big-screen TV comfortably for a long time.
When comparing projectors and televisions, projectors have advantages such as the cost benefits of a larger screen, compact size and storage, and low power consumption, while televisions have advantages such as visibility in bright rooms, high image quality of 4K or higher, and fast startup speed. The most important thing is to choose equipment that suits your viewing environment and needs.
The Aestiquo P1 is a smart projector equipped with features optimized for home TV viewing, making it easy to operate even for beginners, while also keeping maintenance costs low even over the long term. Use the Aestiquo P1 to create an immersive viewing experience like a large-screen TV in your home.
If you have any questions about how to use Aestiquo P1 or watching TV, please contact the support desk below.
・Aestiquo official support: Inquiry form
・Telephone support: 050-5050-9599 (Tuesday to Friday 10:00 to 18:00)
・Product manual: Aestiquo P1 product manual