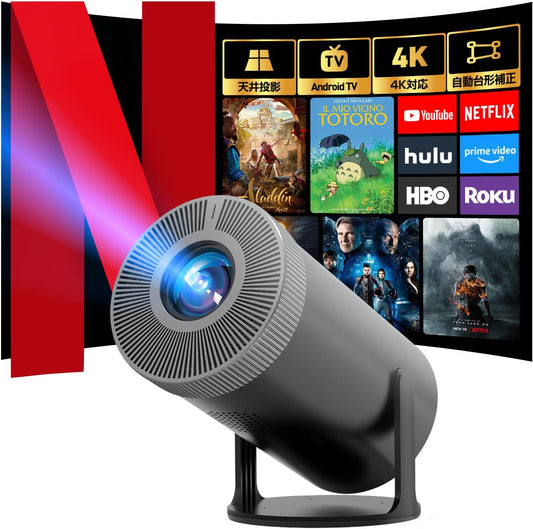

Keystone correction for the Aestiquo Q1 projector: Easily correct image distortion with a single key on the remote control
Share
When you project a movie at home, the image might widen at the top, or the screen might tilt due to the position of the desk. Keystone correction is useful in these situations. However, it is a feature intended to bring the screen closer to a rectangle; it cannot fix issues such as lack of focus, lack of signal from external devices, or a yellowish tint caused by wall color. By separating these symptoms and optimizing your setup conditions first, you can avoid unnecessary over-correction.
Check the screen status before operating the Q1
First, check if the unit's menu screen is projected. If the menu is not displayed, it is not yet time to open the keystone correction screen. Check the power, input, and lens condition first. If an image is displayed but the top/bottom or left/right widths appear different, reconsider the angle between the unit and the projection surface. If only part of the screen is dark or the colors are skewed, consider other potential causes.
The appearance of the four corners may vary depending on the texture or unevenness of the wall. If possible, choose a flat surface and compare under consistent room lighting or window light. How the image appears on a wall is also discussed in our guide to projecting onto a regular wall. Clarifying what you want to fix before proceeding to keystone correction can save you the trouble of reverting settings later.
Why you should fix the setup first
If the shelf or desk holding the Q1 is tilted, or if the unit is angled significantly toward the wall, trying to force a fix with correction alone may make small text difficult to read. Place the projector on a safe, level surface and bring the lens as close to the center of the projection surface as possible. Choose a location where it won't fall, won't block vents, and won't have the cord tripped over. If you change the installation location, readjust the screen size and focus.
Do not generalize distance values; check the projection distance conditions on the product page or in the manual for the specific Q1 you are using. If the target screen size does not fit in the room, it is more natural to reconsider the unit's position or the projection surface than to increase the correction value. Even when aiming toward the ceiling, verify the stand's tilt range and the keystone correction range as separate specifications.
Basic steps for adjusting Q1 keystone correction
- Open the unit's menu and record the current screen shape and setting values.
- Find the item corresponding to "Keystone Correction" in the Q1 menu or manual. Note the available options, such as automatic or manual.
- Bring the unit closer to the front, then adjust little by little while watching the screen. The positive and negative directions will follow the actual display.
- Once it approaches a rectangle, check the text and the appearance of the four corners; if details look unnatural, reduce the correction amount and reconsider the installation position.
- Follow the on-screen instructions to save, and if necessary, check if the settings are maintained after a restart.
It is not always the case that a single button press will fix it, or that it can be operated by a specific remote key. Even if the menu display or operation differs from this article, do not immediately assume the product or remote is faulty. Our comprehensive guide comparing automatic and manual keystone correction is also a useful reference when rethinking your installation position.
Troubleshooting when things don't go well
Left/right distortion remains
First, check if the unit is angled horizontally relative to the projection surface. Whether horizontal or four-corner correction features exist depends on the model number and current product specifications. This article does not claim that all Q1 models support or lack horizontal correction. If support cannot be confirmed, prioritize moving the unit closer to the center.
Text appears blurry after correction
Check if the correction is set too high, and readjust the installation position and focus. If the wall is uneven, localized visibility issues will persist regardless of settings. Try projecting onto a different flat surface for comparison. If the edges of the screen are cut off, reconsider the screen size and distance before trying to force the image to fit the wall with correction.
The remote or unit menu does not respond
Check the battery status, any obstacles between the remote and the unit, and the state of the unit itself. Check your provided accessories and manual for battery types, light-reception positions, and specific button names. If symptoms include the power not turning on, no menu appearing, or only external video failing to display, check the troubleshooting steps for when there is no image first.
FAQ
Q. If I apply correction, will it be a rectangle no matter where I put it?
No. There are model-specific limits to the correction range and direction. First, bring the unit closer to the center of the projection surface, confirm a safe placement, and then apply only as much correction as is necessary.
Q. Can I correct it without losing image quality?
The higher the level of digital correction, the more the fine details may be affected. Check by displaying text or subtitles, and look for a placement that allows you to reduce the correction amount.
Q. How do I revert the settings?
First, return to the original values you noted down and check the guidance in the product menu. Do not lightly perform a factory reset, which deletes other settings as well, just for the sake of keystone correction.
Q. There is no image even after adjustment.
Keystone correction will not fix power or input issues. Verify if the unit's menu displays, and check the power, connected equipment, and input source in order.