
How to Choose a High-Definition Projector: Key Comparison Points Beyond Resolution—Brightness, Installation, and Adjustment
Aiden TsangShare
Projector image quality is not determined by resolution alone
“It said high quality, but the text looks blurry at home,” or “The video looks great, but the colors seem washed out during the day.” Such discrepancies arise not just from the product's resolution, but from the viewing environment, including the room and installation method. Because projectors cast light onto a wall or screen, the impression of the image will change even with the same device between a bedroom at night and a sunlit living room.
What is important before purchasing is not finding the "best specs," but deciding where, what, and how large you want to view. Your priority criteria differ depending on whether you are enjoying a movie in a dark room or watching sports or displaying PC text during the day. If you check the following five points in order, you will be less likely to be swayed by advertising numbers and more likely to choose a unit that fits your intended use.
Comparison Point 1: Distinguishing native resolution from "4K input support"
When comparing how small text or contours appear, the first thing to check is the projector's native resolution. The phrase "4K input support" in product descriptions indicates that the device can receive a 4K signal; it does not mean that the projected image will be native 4K. For example, if the device has a Full HD resolution, even if you input a 4K video, the display will be processed to match the device's resolution. Differences between resolutions are also explained in detail in our Guide to choosing between Full HD, 4K, and 720p.
If your main focus is movies and videos, consider not only the resolution but also the viewing distance and projection size. The closer you are to a large screen, the easier it is to notice image coarseness or focus shifts. Conversely, if viewed from an appropriate distance, the flatness of the projection surface and the focus accuracy may impact your experience far more than the numbers on a spec sheet. For uses involving a lot of text, another point to check is whether the screen is easy to read from the center to all four corners.
Comparison Point 2: Judging brightness based on time of day and room environment
In a bright room, light entering from outside or from interior lighting makes the darker parts of the image harder to see. Therefore, deciding whether your primary use is nighttime movie viewing or daytime living room use will help you determine the necessary brightness. However, the "lumen" labeling and measurement methods can differ by product. Avoid comparing numbers directly if the units and measurement standards are not aligned. You can also check the differences between ANSI lumens and ISO lumens.
If you plan to use it during the day, don't rely solely on the device for a solution; measures such as closing blackout curtains, choosing a position where lighting does not hit the projection surface directly, and avoiding overly large screen sizes are effective. The larger the screen, the more the light is dispersed, meaning the image quality changes depending on the size even in the same room. When comparing products, be specific not only about "how many lumens" but also about "what environment and what screen size you intend to use."
Comparison Point 3: Measuring projection distance and placement first
Even if you like a product, if the room's depth and the projection distance don't match, it will be difficult to use with your desired screen size. Before purchasing, measure the distance from the shelf or table where you intend to place it to the wall, and check the projection distance and screen size guide for each product. You can also refer to our Projection distance and screen size calculation guide to understand how distance and size relate. It is also important to choose a location where you won't block walkways or have power cords running across your feet.
While using keystone correction to adjust an image projected from an angle is convenient, the fundamental approach is to place the unit as close to being directly in front of the projection surface as possible. Sometimes slightly changing the installation position is more effective at making text and screen edges easier to see than projecting from a large angle. Even if you want to project onto the ceiling in a bedroom, "being able to project toward the ceiling" and "being able to mount the unit to the ceiling" are separate requirements. Even for products with rotating stands, you must check individually whether they support hanging installation.
Comparison Point 4: Checking ease of focus and keystone correction
If you plan to move the projector around, the ease of adjustment each time is just as important as the image quality specs. If it is not in focus, you won't see crisp contours even with a high-resolution input. Before purchasing, check the product description for the focusing method, whether it can be adjusted via remote control, and the range and operation of keystone correction.
After installation, use text or thin lines in the center of the image to focus, then check the four corners. Before adjusting the shape with keystone correction, try to align the height and orientation of the unit as much as possible. If you feel the image isn't clear, it is easier to narrow down the cause by checking the lens cleanliness, projection distance, focus, and input source, in that order, rather than immediately changing the image quality settings. When cleaning the lens, follow the product manual and use a method that will not cause scratches.
Comparison Point 5: Considering the wall, screen, and input source
Projecting onto a white wall is an easy way to start, but the texture and color of the wallpaper, as well as shadows from furniture, will affect the image. If you want to make fine text or dark movie scenes easier to see, choose the flattest and brightest projection surface possible. When considering a screen, judge based on the screen size, as well as placement, ease of storage, and room lighting.
The quality of the input video cannot be overlooked. You cannot turn low-quality video or an unstable connection into high-definition quality solely through the projector's settings. If the screen looks blurry, try testing with different videos or input devices to isolate whether the issue lies with the projector itself or with the source video or connection. Viewing a test sample for each primary use—movies, games, photos, or documents—will help you identify necessary adjustments after purchase.
Organizing priority criteria by intended use
| Usage | Check this first | Commonly overlooked |
|---|---|---|
| Watching movies in the bedroom at night | Installation distance, projection direction, ease of focus | Ceiling projection vs. ceiling mounting are different |
| Watching in the living room during the day | Light-blocking capability, screen size, brightness measurement type | Lumens alone don't guarantee image visibility |
| Gaming or displaying text | Native resolution, connection method, edge readability | 4K input support vs. native 4K |
| Moving between rooms | Portability, focus and correction controls | Readjustment may be needed every time you move it |
How to view and compare Aestiquo products
Q1: When prioritizing projection direction and ease of installation
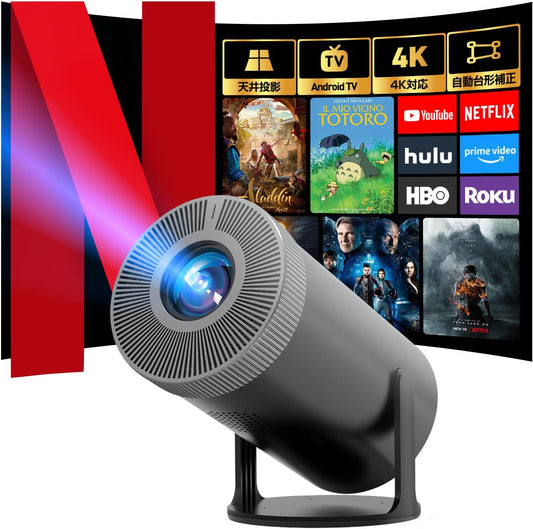
The Q1 product information provides guidance on its native 1080P, support for 4K source input, 270° rotating stand, and auto keystone correction. If you want to change the projection direction in a bedroom or similar space, check if you can place the unit in your desired location and if the distance to the wall or ceiling is suitable. While you can project images onto the ceiling, do not choose this product under the assumption that it can be directly mounted to the wall or ceiling.
X26: When you want to adjust focus while changing locations
The X26 product information provides guidance on its native 1080P, 4K input support, 180° rotation design, and remote-controlled electric focus. If you move it often, a key comparison point is how easy it is to adjust after changing the screen orientation. For both models, do not mistake "4K input support" for native 4K, and consider the placement and viewing environment together.
Order of checks to improve image quality after purchase
- Adjust room lighting or outside light so that it does not hit the projection surface directly.
- Check the distance to the wall or screen and place the unit to match your desired size.
- Orient the unit as squarely as possible toward the projection surface before focusing.
- Use keystone correction only to the extent necessary, and compare the text in the center and corners.
- Try a different video or input device to confirm whether there is a difference based on the source material.
This order helps prevent losing track of the cause by changing too many settings at once. If shadows, dots, or lines persist in specific areas despite these steps, it may be an issue separate from standard image quality adjustments. Do not attempt to disassemble the unit; check the instruction manual or contact our support team.
Frequently Asked Questions
Will a high-quality projector always look clear in a bright room?
Not necessarily. The appearance changes depending on outside light, interior lighting, projection size, and the condition of the wall or screen. If you plan to use it during the day, check how well you can block light in the room before purchasing.
If it says 4K support, is the projected image native 4K?
No. "4K input support" is sometimes used to mean it can receive a 4K signal. Please check the native resolution of the unit separately.
When a projector's image looks blurry, what should I fix first?
First, check the installation distance, orientation of the unit, and focus. Next, check the projection surface and the original video; comparing whether the same symptoms occur with a different input makes it easier to narrow down the cause.
Can a product that projects on the ceiling be mounted to the ceiling?
No. Being able to aim the image toward the ceiling is different from being able to fix the unit to the ceiling. Please check the specifications of each product for installation methods. Do not select the Q1 under the assumption that it can be directly mounted to a wall or ceiling.