
How to turn your bedroom or living room into a movie theater with ceiling projection | Home Movie Night with Aestiquo P1
If you want to relax and enjoy movies in your bedroom or living room, consider using the ceiling as a projection surface in addition to the wall. Because you can watch images without moving your gaze significantly, it creates a relaxing atmosphere different from watching TV, perfect for watching movies in bed, storytime with children, or displaying photos after a trip. The key to success lies beyond just the projector's performance; it is important to first set up the projection area, room brightness, audio, wiring, and viewing duration.
When watching movies at home, sitting in front of the TV isn't the only way to do it. Turning down the lights on a holiday night and enjoying a large image while lying in bed, or laying cushions on the living room floor to watch short films or concert footage with the family—ceiling projection is perfectly suited for these kinds of experiences.
On the other hand, because ceiling projection offers more freedom in placement than projecting onto a wall, you need to consider factors such as image tilt, focus, your line of sight when lying down, and the position of the power cable. To ensure you don't end up thinking "this is harder to watch than I expected" after purchasing, this article explains the actual flow from preparation to cleanup to help you get started with your home movie night.
1. Why ceiling projection is ideal for home movie nights
You can watch while resting your body without straining your neck
When viewing images projected onto a wall, you have to maintain a seated posture on a sofa or chair. With ceiling projection, you can change positions on a bed or rug while you watch. It is also convenient when you want to take a short break during a long movie or watch something for a little while before going to sleep.
However, projecting at an angle that forces you to bend your neck awkwardly will cause fatigue. The trick is not to fix the image directly overhead, but to project it to a position where your eyes naturally rest when lying down. First, try a test projection on a white wall or ceiling, and adjust the image center relative to your pillow position.
You can create a big screen without changing how the room is used
To place a large TV, you would have to change your furniture layout or viewing distance. With a projector, you can put it away when not in use or place it on a low stand or side table. It’s possible to use the living room as a living space during the day and turn it into a home theater only on the weekends.
Easier to accommodate everyone's way of enjoying it
Even in the same room, what people want to watch—movies, anime, travel memories, sports, or games—varies by person. If you project a large image onto the ceiling or wall, you can sit around it or lie down a little further away. This increased flexibility in viewing positions is a major benefit when using it as a family.
2. Checking the room and projection surface before starting
Choose a white surface with minimal texture
Even without a dedicated screen, you can start by using a ceiling or wall that is white or light-colored with minimal patterns or textures. Surfaces with wood grain, dark colors, or fine textures can alter how colors or text appear. If you are watching something with subtitles, choose as uniform a surface as possible.
If there are lighting fixtures, fire alarms, beams, or air conditioners on the ceiling, check to ensure they do not overlap with the projection area. If you choose a spot where part of the image is cut off, it will remain difficult to watch even with keystone correction. Measure the approximate projection area with a tape measure and check if it is visible from your viewing position before moving any furniture to avoid mistakes.
Consider brightness alongside "can I make the room pitch black?"
If you choose a projector based only on its brightness, the impression may be different in your actual room. The required environment changes depending on whether you watch during the day, at night with the lights off, or if you can use blackout curtains. If home movie nights are your main focus, finding ways to darken the room may be more directly linked to how clear the image is.
In homes where the lights cannot be turned off completely, keep direct light away from the area around the image. Place indirect lighting behind or to the side, and adjust it so that light does not reflect off the projection surface. Depending on the placement, even small lights can change how easy it is to read subtitles.
3. The basic home movie night kit
| Item | Role | Key selection criteria |
|---|---|---|
| Projector | Projects images onto wall/ceiling | Check installation angle, correction features, resolution, and connectivity |
| Playback device/Service | Plays movies/videos | Organize how to use (HDMI, Wi-Fi, supported apps, etc.) |
| Power strip | Supplies power to equipment | Place in a spot that doesn't cross pathways and organize cables |
| Audio equipment | Makes dialogue and music clearer | Choose between internal speakers, Bluetooth, or external speakers based on needs |
| Blackout curtains/Eye mask | Darkens room for better viewing | Ensure light from windows doesn't hit the projection surface |
There is no need to acquire too much equipment from the start. It is easier to create an environment suited to your room by first trying with just the projector, playback device, and power source, and then adding more if you are dissatisfied with the volume or connectivity.
4. Steps to begin ceiling projection with the Aestiquo P1
- Decide on your viewing position first. Choose the area on the ceiling where your eyes naturally gaze after positioning your bed or sofa.
- Place on a stable surface. Avoid placing it on a bed or unstable boxes, and ensure there is enough space for heat to dissipate.
- Aim at the projection surface. Move it to a position where the image is neither too big nor too small, and adjust the size manually first.
- Adjust keystone correction and focus. Check the four corners of text or subtitles and adjust so the entire screen is easy to view.
- Connect the playback device. Select the method that suits the device you are using, such as HDMI or wireless connection. Check the compatibility requirements for each device before connecting.
- Adjust volume and lighting. Start playback after ensuring dialogue can be heard and no excess light is hitting the projection surface.
- Do a test run with a short video. Rather than starting a long feature, check the focus, sound, your posture, and cable safety with a 5-10 minute video.
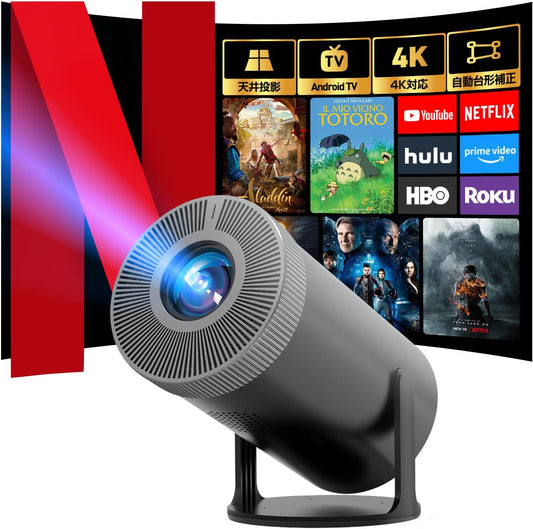
The Aestiquo P1 is a smart projector marketed on its product page for features such as ceiling projection, Android TV, and 4K support. Since support status for services and connected devices may change, check the latest specifications before purchasing and connecting.
5. Ideas for enjoying ceiling projection in different scenes
Weekend movie night
Once you decide on the film, prepare drinks and snacks beforehand to minimize the number of times you need to get up during the show. Rather than turning off the lights completely, leaving a dim light so you can see your feet makes moving around safer. Simply turning off notifications and putting your smartphone aside before the screening helps you focus better.Short films with children
When watching with children, it is easier to match their attention span by starting with short animations, educational content, or nature documentaries rather than long films. Place the projector unit and power cables where children cannot reach them, and avoid long periods of continuous operation if there is a risk of falling asleep. Setting a time limit and a signal for when it will end makes cleanup smoother.
Screening travel and event memories
Viewing travel photos and videos taken on a smartphone with your family can spark great conversations. Since photos often have different brightness levels and aspect ratios, creating a playlist in advance and arranging them in the order you want to show them will reduce manual operation on the day. Confirm with your family what range of photos are okay to share before projecting them.
6. Checklist for when things look or sound off
If the image is blurry, check the lens for dirt, look for texture on the projection surface, check for projector vibration, and check the focus position in order. If the sound is too low, check if the volume on the unit and the playback device are controlled separately, and ensure that Bluetooth devices are not connected to another terminal.
- Subtitles are hard to read: Don't make the entire screen too large, and check the text in the four corners away from the center.
- Screen is tilted: Bring the unit closer to the projection surface and look for a position that doesn't rely too heavily on correction.
- Image feels dark: Reduce interior lighting or window light, and check if there are shadows cast on the projection surface.
- Audio is delayed: Switch between wireless and wired connections and review the audio settings on the playback device.
- Stops in the middle: Check communication status, playback device power, cable connections, and ensure the unit is not overheating.
Recommended model: For those who want to try ceiling projection
Aestiquo P1 Smart Projector
For those looking to start ceiling projection or a home theater, you can consider the Aestiquo P1 as a candidate. The product page lists features such as Android TV, 4K support, and ceiling projection. Please check the latest product information and the terms of each service to confirm compatibility with your installation location and desired viewing services before making your choice.
View product details for Aestiquo P1Frequently Asked Questions
Do I need a dedicated screen for ceiling projection?
What should I be careful about when using a projector in the bedroom?
Can I enjoy ceiling projection during the day?
Can I project smartphone videos onto the ceiling?
Can I watch movies with just the projector sound?
Summary: Ceiling projection is less prone to failure if you decide your viewing posture first
The appeal of ceiling projection is that you can turn your bedroom or living room into a special viewing space without major renovations. The order for success is a 4-step process: decide on your viewing position, check the projection surface, adjust light and sound, and do a test run with a short video.
It can be applied to more than just movies—think children's content, photo slideshows, or concert footage. When considering the Aestiquo P1, don't just judge by the specs; consider the room size, installation location, content you want to watch, and connection methods. Starting with a small home theater that fits your lifestyle is the shortest path to long-term enjoyment.