
How to Use a Fire TV Stick to Turn Your Projector into a Streaming Device|A Guide to Connection, Audio, and Troubleshooting
Aiden TsangShare
When you want to watch Netflix, YouTube, or other videos on a projector, you can connect a streaming device to the HDMI input instead of using smartphone mirroring. While the connection itself is straightforward, troubleshooting issues like no image, no sound, an unresponsive remote, or Wi-Fi connection problems is much easier if you check the device's power supply, HDMI input, network connection, and app-side settings in order.
After purchasing a projector, many people find themselves wondering, "How do I watch video streaming services?" or "Do I have to connect my smartphone every time?" Even if a projector has built-in smart features, it may be easier to operate using an external streaming device, depending on the apps you want to use and your account status.
A Fire TV Stick is a device that connects to display equipment with an HDMI input to play video, music, and more over Wi-Fi. By connecting it to a projector, you can enjoy videos on a large screen just like a TV. This article explains everything from what to check before you buy to the connection procedure, how to isolate video/audio/communication issues, and settings for safe family use, all in a way that is easy for beginners to understand.
1. What you need to connect a Fire TV Stick to a projector
| Required Item | Role | Points to Check |
|---|---|---|
| Projector with HDMI input | Receives video and audio | Check the location of available HDMI ports and how to switch inputs |
| Fire TV Stick unit | Plays video streaming services | Check accessories, device generation, and the account to be used |
| Power adapter and USB cable | Supplies power to the streaming device | Secure a power source, as a projector's USB port may not provide enough power |
| Stable Wi-Fi | Streams video content | Check if the signal reaches the installation spot and have your password ready |
| Remote control | Operates input, apps, volume, etc. | Insert batteries and pair with the device during initial setup |
Since HDMI can transmit both video and audio simultaneously, it is a simple way to manage your cables. However, the Fire TV Stick cannot be powered by the HDMI cable alone. Be sure to check the availability of a power outlet near the installation site, including the space needed for the power adapter and USB cable.
Also, even if a projector has an HDMI port, if the port is located on the back or side, you might not be able to push the projector flush against a wall when the device is plugged in directly. Do not force the connection or put weight on the port; consider using a short extension adapter or cable if necessary. Always ensure the shape of the terminal matches the device's manual.
2. Projector-side conditions to check before connecting
Is the HDMI input ready to use?
Projectors may have multiple types of input terminals, such as HDMI, USB, and AV. You should basically connect the Fire TV Stick to an HDMI input. Plugging it into a USB port does not guarantee it will be recognized as a video input. Check the terminal labels and ensure you can select HDMI from the input switching menu.
Can you secure power and proper ventilation?
If you place a projector against a wall or deep on a shelf, it becomes difficult to reach the HDMI and power ports. Furthermore, blocking the air vents can cause the unit to overheat. Before connecting, ensure there is enough room for air to circulate around the unit, and choose a location where the device and cables won't be left dangling.
Is the projector compatible with copyright protection?
Video streaming services use copyright protection mechanisms during external output. Depending on the combination of projector, HDMI cable, and conversion adapter, the home screen may display correctly, but the screen might go black when you try to play a title. Check the compatibility requirements for your projector and playback device before adding any unofficial conversion equipment.
3. Steps to connect a Fire TV Stick to a projector
- Turn off the projector. To avoid putting undue stress on the ports while connecting, turn the power off first.
- Plug the Fire TV Stick into the HDMI input. Align the port direction and insert it gently until it is fully seated. Do not push it in forcefully or fix it at an angle.
- Connect the power cable. Use the included or a compatible power adapter to supply stable power to the device.
- Turn on the projector and the device. Wait for startup to complete and ensure you are within range to operate the remote.
- Switch the input to HDMI. Use the projector's input button or menu to select the HDMI number where the Fire TV Stick is plugged in.
- Follow the on-screen instructions for initial setup. Set up remote pairing, language, Wi-Fi, and account details in order.
- Test playback with a short video. Do not judge based solely on the home screen; play an actual video for a few minutes to confirm the stability of video, audio, and network connectivity.
If you aim the projector at the ceiling or hide the cables from the start, it will be harder to find the cause if a problem occurs. It is safer to connect everything on a desk where you can see the screen easily first, and then arrange the installation and wiring after confirming it works.
4. Troubleshooting when there is no image
Even if you see "No Signal," "No Input," or a black screen, it could be due to an incorrect input selection, insufficient power, a loose HDMI connection, or the startup order. Checking these in order can save you from buying unnecessary equipment.
- Check the HDMI number: Verify the input list to ensure you haven't selected HDMI2 when it is plugged into HDMI1.
- Check the power cable: If there is no light on the device or no response on the screen, check the USB cable, power adapter, and outlet.
- Unplug and reconnect: Turn off the projector and Fire TV Stick, re-seat the HDMI connection, and reboot.
- Remove unnecessary conversion equipment: If you are using splitters, AV converters, or excessively long extension cables, try a simple connection first.
- Try a different HDMI port: If there are multiple inputs, check if it is recognized on another port.
- Check if it only goes dark during playback: If the home screen appears but titles don't play, check for copyright protection or compatibility requirements.
If there is no change after switching inputs, try turning on the projector first, then starting the Fire TV Stick. Some devices read information about the connected unit at startup, so turning on the device afterward can sometimes make it easier to be recognized.
5. When there is no sound or you cannot adjust the volume
First, check the volume of the unit and the playback device separately
If there is an image but no sound, check if the projector's volume is set to zero, if the Fire TV Stick is muted, or if the audio is being routed to external speakers. If operating the remote doesn't solve it, check the volume menu on the projector itself.
When using Bluetooth speakers
Using external speakers can make movies and music easier to hear. However, if you don't decide beforehand whether to connect to the Fire TV Stick, projector, or speaker, the audio may output to the wrong device. If there is audio lag after connecting via Bluetooth, try switching back to the built-in speakers to see if the delay disappears.
Check HDMI-based audio
Whether a projector can correctly process audio sent via HDMI from a Fire TV Stick depends on the model. If there is no sound with the automatic audio settings, change to a compatible output setting. Refer to the device manual or manufacturer guidelines for specific options, and avoid changing advanced audio settings if you are unsure what they do.
6. When Wi-Fi and video playback are unstable
If the Fire TV Stick home screen displays, but the video stops, image quality drops, or it takes a long time to start playback, check the network status. The Wi-Fi signal might be weak at the location of the streaming device, rather than the projector's position.
| Symptom | Location to Check | First Steps to Try |
|---|---|---|
| Network not in Wi-Fi list | Router, device distance, Wi-Fi settings | Reboot the router and move the device closer to rescan |
| Video stops mid-playback | Signal strength, number of connected devices, congestion | Stop unnecessary communications and re-test with a short video |
| Unstable image quality | Streaming settings, connection speed, title quality | Use auto-quality and test a different title at the same time of day |
| Only one app won't start | App updates, account, service outage | Close and restart the app, and check official service status |
When entering a Wi-Fi password, double-check uppercase/lowercase letters, numbers, and symbols accurately. A small mistake in similar characters can prevent connection, so review what you entered after typing. It is also important not to try to solve communication stability issues solely by adjusting the projector's image settings.
7. Considerations when combining the Aestiquo P1 with a streaming device
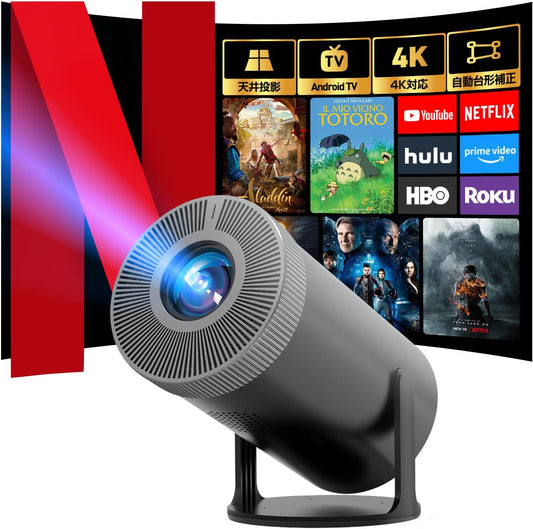
Aestiquo P1 Smart Projector
If you are looking for a projector to enjoy video streaming on a large screen, the Aestiquo P1 is also an option. The product page mentions features like built-in Android TV, 4K support, and ceiling projection. Whether to use an external streaming device should be decided by comparing the services you want to use, connection methods, remote control operation, and network environment.
View Aestiquo P1 Product DetailsEven if a smart projector has built-in app functionality, there are benefits to adding an external device: it is easier to consolidate app operation onto one remote, it is easier to move your playback environment if you upgrade the device, and you are less dependent on the app compatibility of the projector itself. On the other hand, because you are adding more equipment, you will need to manage power, HDMI, remote controls, and Wi-Fi.
8. Installation and settings for safe family use
When using it in a living room or a room with children, prioritize wiring safety over image quality. Cables running across the floor can cause tripping or snagging. If you place the projector on a high shelf, ensure that the device and power adapter cannot fall, and avoid pushing it into a space where heat can build up.
If you share a viewing account with your family, check purchase settings, parental controls, and profiles. If children are likely to use it, it is safer to set age-appropriate restrictions and decide on a designated spot for the remote. When finished, follow the manuals to turn off the projector and streaming device, and avoid leaving them on for extended periods.
Frequently Asked Questions
Can the Fire TV Stick be used with any projector?
Can I connect the Fire TV Stick to a projector's USB port?
What should I do if there is an image but no sound?
The Fire TV Stick home screen appears, but movies won't play.
Is a Fire TV Stick necessary if the projector has Android TV built-in?
Summary: Troubleshoot by isolating HDMI, Power, and Wi-Fi
When connecting a Fire TV Stick to a projector, it is easier to identify the source of trouble by separating the three roles: sending video via HDMI, securing a separate power supply, and streaming video via Wi-Fi. Check inputs and power if there is no video, check output destinations and volume if there is no sound, and check Wi-Fi and apps if playback keeps stopping.
It is safest to perform a simple connection on a desk first, and then install it near a wall or for ceiling projection once you have confirmed it works. Whether you are considering the Aestiquo P1 or another model, choose your environment by considering not only the projector's internal features but also the video services you want to watch, the necessity of external devices, the location of HDMI and power ports, and ease of use for the whole family.